First off, what does waxing a car do? Polishing and waxing a car is one of the best ways to keep it looking new for years to come. So today, GoodCar will guide you through each step of how to properly wax a car and show you how to do it safely and effectively. Get ready for a silky-smooth finish and an in-depth look at all the materials and techniques needed to get that perfect shine!
Regular waxing is one of the most important steps in keeping your car’s paint looking new. Waxing protects the paint from UV rays, water, and other environmental contaminants that can cause fading and wear, and it also makes the paint look shiny and new.
Waxing is not a difficult task, but there are a few things you need to do to ensure that you are doing it correctly. This guide will walk you through the process of waxing your car so that you can keep its paint looking great for years to come.
Step 1: Prepare the Vehicle & Your Materials
When waxing a vehicle, you need to gather a few materials beforehand. Here is a list of what you will need:
- A clean, dry car
- A towel or two
- Wax
- A bucket
- Sponge or applicator
- Water
Once you have gathered all the materials, it is time to start preparing the vehicle. Make sure that the car is clean and dry before starting. If dirt or grime is on the car, it will be more difficult to apply the wax evenly. Once the car is clean, use a towel to dry it off completely.
Next, take the wax and start applying it to the car using either a sponge or applicator. If you are using a sponge, make sure to get an even coat of wax on all areas of the car. If you are using an applicator, apply the wax in small circular motions until all areas are covered. Once the wax is applied, let it sit for a few minutes before moving on to the next step.
Step 2: Clean the Wax From the Area to be Waxed
When waxing a car, you need to ensure the area is clean and free of any old wax buildup. The best way to do this is to use a product specifically designed for removing car wax, such as a degreaser or all-purpose cleaner. Apply the cleaner to a soft cloth and wipe away any old wax in a circular motion. Once the area is clean, rinse it with water and dry it with a clean towel.
Step 3: Select the Right Product or Create Your Own
Selecting the right types of car cleaning supplies, such as automotive wax, is not always easy. Some brands and types will work well for one type of vehicle and driving conditions and be terrible for others, so it’s important you research the type of wax that would best suit your particular needs. If you’re not keen on hunting down a brand, you can always opt to make your own.
To create a wax, you will need the following:
- One cup of beeswax
- One cup of carnauba wax
- One quart of mineral spirits
- A double boiler
Instructions:
- Place the beeswax and carnauba wax on the top of a double boiler. Add the mineral spirits to the bottom of the double boiler. The mixture should not touch the water.
- Heat the mixture, occasionally stirring, until it reaches a temperature between 145 and 150 degrees Fahrenheit.
- Remove from heat and pour into an airtight container. Allow to cool completely before using it on your car.
Step 4: Spread Wax Onto Surface and Spread Evenly by Using a Low-Speed Orbital or Rotary Polisher
If you’re using a solid wax, start by rubbing it directly onto the paint until the whole surface is covered. Then, if you don’t know how to wax a car by hand, use a low-speed orbital or rotary polisher to spread the wax evenly across the surface. Waxing a car by hand is a bit more difficult, but it has certain rewards that a machine just won’t give you. Likewise, a machine can give you faster (and sometimes better, depending on your skill level) results than using your own two hands. Make sure to go over the entire car, paying special attention to areas that get a lot of sun exposure. Once the wax is evenly applied, let it sit for the recommended amount of time before buffing it off with a clean microfiber cloth.
The Benefits of Using a Power Orbital Hand Buffer
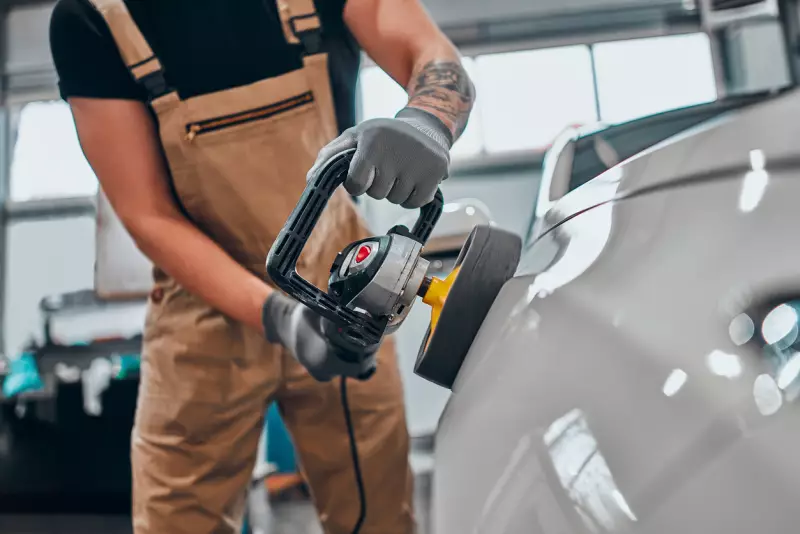
One of the benefits of using a power orbital hand buffer is that it can save you time and effort. Waxing your car by hand can be a tedious and time-consuming task, but using a power buffer can make the process much faster and easier.
Another benefit of using a power buffer is that it can help you achieve better waxing results. When you wax your car by hand, it can be difficult to distribute the wax over the surface of your car evenly. This can lead to streaks or missed spots. But with a power buffer, you can ensure that the wax is evenly applied and that your car will have a smooth, streak-free finish.
If you want to get the most out of your car waxing experience, then using a power orbital hand buffer is the way to go. With its time-saving and results-driven benefits, there’s no reason not to use one!
Hand Buffing Your Car and the Benefits
There are many benefits to hand-buffing your car. The first benefit is that it will remove any existing wax on the paint surface. This will give the new wax something to “bite” into and adhere to, resulting in a better bond and longer-lasting protection.
Another benefit is that hand buffing will help to level out any swirl marks or light scratches in the paint, giving the car’s finish a more even appearance. This is especially beneficial if you’re planning on applying a new coat of paint or clearcoat over the buffed area - a smoother surface always results in a nicer final product.
Finally, hand buffing simply feels good! It’s satisfying to see the dirt and grime coming off of your car’s paint as you work, and you can really take pride in achieving a sparkling clean finish.
Step 5: Apply a Coat of Carnauba Paste Wax with a Foam Pad Applicator
After you have applied a thin layer of carnauba paste wax, it’s time to apply a coat of carnauba paste wax with a foam pad applicator. Make sure to apply the wax in a circular motion and avoid going over any area more than once. Once you have applied the wax, let it dry for at least 20 minutes before buffing it off with a clean microfiber cloth.
Step 6: Remove Excess Overspray
As you finish spraying each section, remove any excess wax with a clean, dry towel. Be sure to wipe in the same direction as the grain of the paint to avoid scratching it. You may need to go over some areas multiple times to get all the wax off.