When it comes to a vehicle's braking system, one crucial but often overlooked aspect of upkeep is rotor resurfacing. This is because many car parts have predictable lifespans. Manufacturers can estimate how much pressure and use to expect and tell people when to check-in.
However, brake rotors experience inconsistent stress over their lifetimes, which can cause early imperfections and uneven surfaces. These minor damages compromise braking performance and the vehicle's safety.
Rotor resurfacing addresses the problem of uneven rotor wear but requires knowing the safety concerns and how to judge when it's necessary.
What is Rotor Resurfacing?
Rotor resurfacing, also called rotor machining or rotor turning, is the process of machining the surface of the rotor to remove imperfections and restore smoothness. It's a less costly alternative to rotor replacement, which can cost you hundreds of dollars per axle.
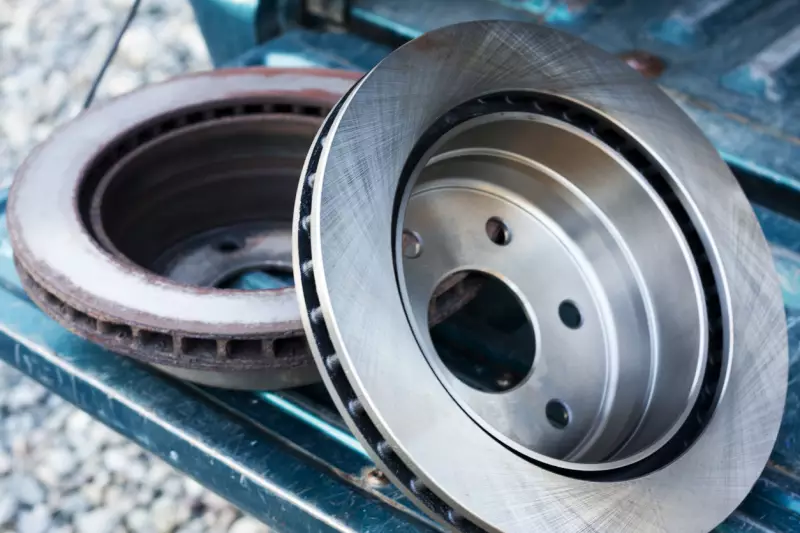
Brake rotors are discs attached to the vehicle's wheels that are squeezed between brake pads to slow down a vehicle. This process generates large amounts of friction and heat, which create surface irregularities in the rotor.
Warped rotors cannot effectively generate friction, disperse heat, or shake off liquid. If the rotor's surface isn't sufficiently smooth, the brake pads cannot make complete contact, significantly increasing the braking distance.
The resurfacing process involves several steps, including rotor inspection, machining, finishing, and quality control. These steps ensure that resurfacing alone is enough to get your brakes back to a safe state and that your vehicle will perform optimally.
How to Resurface Rotors
The first step to any vehicle maintenance task is to ensure your safety. Only work on a secure, flat surface; wear protective goggles, gloves, and a mask when necessary. Other tools to prepare include:
- Socket Wrenches
- Breaker Bar
- Jack & Lift
- Allen Wrenches
- Rotor Micrometer
- Brake Lathe
Additionally, when doing undercarriage work, take a beat to look up the manufacturer's suggested jack points.
Removing and Inspecting the Rotor
You'll need to remove the rotor for a more thorough inspection. An eyeball test isn't enough and may lead to false confidence in the rotor's condition.
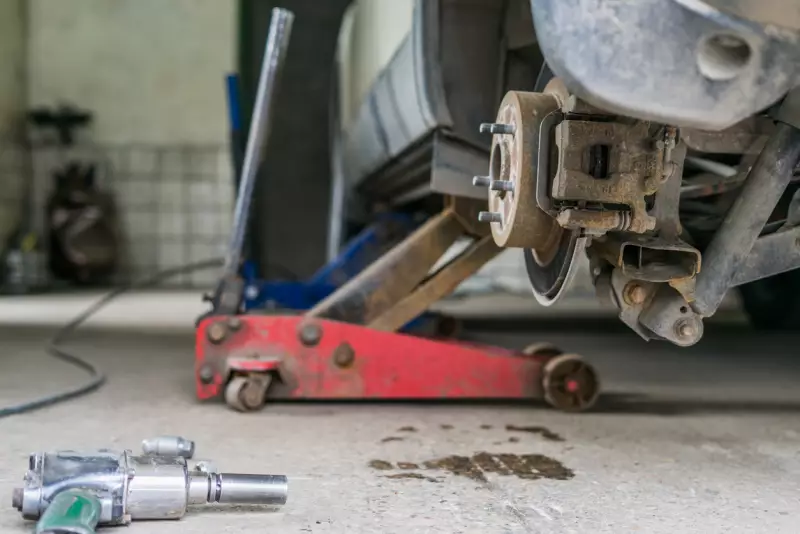
Remove the wheel by lifting the vehicle with a jack and using a breaker bar & socket wrench to unscrew the lug nuts.
Next, locate and remove the caliper bolts and brake caliper. These bolts are typically removed with an Allen Wrench but may require more traditional sockets depending on design. Turning the steering wheel left or right might provide a superior angle if you don't have space to reach your caliper well.
Finally, you can remove the brake pads and rotor. You should be able to pull the rotor out by hand, but you can loosen it with a mallet if it's stuck in place. It's important to note that the rotor may be secured in position with a small screw on its surface. If so, you must apply pressure to the screw in a counter-clockwise direction using a Torx bit to loosen and remove the screw before the rotor will come free.
Now that you can access the rotor easily, wipe it with a rag, take off your gloves, and run your fingers across. You're feeling for grooves on the surface and a raised lip on the edge. If you detect a crack, you need a new rotor rather than a resurfacing.
You should also use a rotor micrometer to measure the rotor's thickness at various points across its surface. Compare the measurements to the manufacturer's specified requirements to ensure you have the leeway to shave off some thickness to get everything even without creating a rotor too thin to perform.
Another telltale sign that it's time for a treatment is heat spots. These are discolored sections on the rotor that are sometimes covered in an abrasive mineral called cementite. Heat spots form when brake pads make uneven contact with the rotor and deposit some of their material on the surface.
Lastly, keep an eye out for rust. While rust is inevitable in car parts, you must know what kind of rust you're dealing with. Surface rust comes off easily and has negligible effects on brake performance.
However, corrosive rust penetrates deeper and compromises the integrity of your rotors. If you notice this type, replace the rotor ASAP. Corrosive rust is more common in climates with salty air or when a vehicle goes a long time without being used.
Resurfacing the Rotor
If you have a brake lathe lying around, you can resurface an out-of-shape rotor without visiting the mechanic. Technically, you could simulate a brake lathe with a high-grit sandpaper (300+), but we caution against it.
Your vehicle lugs around friends and family and allows you to explore the world. Using sandpaper is extremely imprecise and may worsen your braking system, increasing the danger to your passengers and everyone around.
As its over $1000 price suggests, the brake lathe isn't a simple machine and must be carefully operated. If you own one, you're likely a professional yourself or relatively well-versed in the field.
Anyone inexperienced with this tool should seek supervision from a professional. Doing so will keep you safe and stop you from destroying your rotor or the brake lathe.
First, use a sander to remove rust or corrosion from the rotor. You want to create as even a surface as possible before rigging it to the lathe. A uniform surface lowers the chance of rigging the rotor crooked between the mounting hubs.
- Mount the rotor to the lathe with an appropriate centering cone, adapters, and dampener.
- Attach a vibration-dampening spring around the rotor to stop vibrations during resurfacing.
- Perform a scratch test to check if the rotor is level.
- Turn on the brake lathe, touch both cutting edges to the rotor and set this depth as the zero marker.
- Draw the cutting head into the inner brake surface without touching the mounting hub.
- Determine how much you want to remove from the rotor's surface and perform a rough cut.
- Draw the cutting head into the inner break surface and perform a fine cut.
Reinstalling the Rotor
Whether you're using a replacement or a freshly resurfaced rotor, you will follow the removal steps in reverse. However, there are a few chores you have to do before closing everything up.
Check the mounting surface and use a wire brush to remove debris. Any debris, such as rust or small autumn leaves, will prevent a flush connection and ruin your braking system.
You can install the new rotor once the mounting surface is clear. This is also your best chance to switch out the other brake hardware, especially if you didn't find a problem with your rotor. Look closely at the caliper and brake pads and replace them as needed. After replacing the rotors or pads, it's crucial to follow up with the bedding-in process for your new components. Bedding in brake pads and rotors involves a specific series of braking actions to properly mate the brake pad material with the rotor surface.
How Long Do Resurfaced Rotors Last?
Resurfaced rotors should have a similar longevity to their original state. A resurfaced rotor is nearly identical to the original. The only difference is that it is a few thousandths of an inch thinner than before.
The time between treatments or replacements will stay the same, but there's a limited number of times a rotor can be resurfaced. Shaving away layer after layer eventually leaves the rotor too narrow and compromises the vehicle's safety.
We recommend getting them treated or replaced every 50,000 to 70,000 miles. The predicted range is wide because a rotor's lifespan is significantly affected by several factors, including:
- The weather and climate the vehicle is kept in
- Number of drilled or slotted holes
- Quality of the brake pad
- Driving conditions
- Driver habits
It's recommended that drivers check the rotors alongside the brake pads, but they may wear down quicker than you think. A few signs that indicate it's time to check on them include the following:
- Increased vibrations in the steering wheel: This is most noticeable when braking at high speeds and happens when the brake pads slide across an uneven rotor.
- Grinding sound when braking: Brake pads silently brush against the rotors when they're smooth. When you hear new grinding noises, this indicates the presence of bumps, rust, or other corrosion.
- Bumpy brake pedal: A shaky brake pedal is relaying the shaking rotor. It also points to thin points in the rotor and uneven contact by the pads.
- Dents and chips: Even if you can't see physical damage, you might feel inconsistencies when you run your finger along the rotor's surface area. Human fingertips can feel bumps as small as half the width of a human hair.
How Much Does it Cost to Resurface Rotors?
Rotor resurfacing is far from the most expensive procedure you'll get at the mechanic. Depending on a few factors, you can spend anywhere from $20 to $58 per rotor. However, this cost only occurs every few years unless you drive significantly more than the norm.
The following expenses are built into the estimate:
- Labor: In most trade professions, labor costs typically account for a significant portion of total cost. Customers pay for quality assurance, speed, and the professional's experience.
- Materials: Brake lathes are a niche and expensive tool. Most vehicle owners don't have access to one, which leaves mechanics as their best option. Resurfacing has other costs, such as cutting tools, dampeners, cleaning solvents, lubricants, and mounted lifts.
If resurfacing won't solve your issue, replacing your rotor is the only option. On average, rotor replacements cost $50 to $80 each, which is slightly more expensive. However, you can only resurface a rotor a limited number of times.
How Many Times Can Rotors Be Resurfaced?
Rotors have thickness limitations that determine the number of times they can be resurfaced. Each time it's machined, a small amount of material is shaved off to eliminate imperfections and return it to its original state.
Eventually, the rotor reaches a point where it becomes too thin to resurface and withstand the pressure from braking safely. Manufacturers typically specify a minimum thickness for rotors, past which they must be replaced. Ignoring this recommendation leads to a higher risk of brake failure.
The overall condition of the rotor, including the presence of cracks, warping, or excessive wear, can impact its resurfacing potential. Rotors with significant damage or structural flaws may not be suitable candidates for resurfacing and may require replacement.
Conclusion
Rotor resurfacing is crucial for maintaining secure braking systems in vehicles. Unlike predictable car components, rotors face inconsistent and high pressure. This causes rotors to develop structural issues typically defined by shaky car control.
Resurfacing rotors restores full functionality without buying a more expensive replacement part. However, rotors can only be resurfaced a limited number of times before becoming too thin for continued use.
The good news is that each resurfacing treatment lasts tens of thousands of miles, giving each rotor a significant lifetime. While it's possible to resurface yourself, we recommend most people leave it to the professionals. Brakes are a vital safety and control feature and should be given the utmost care.